

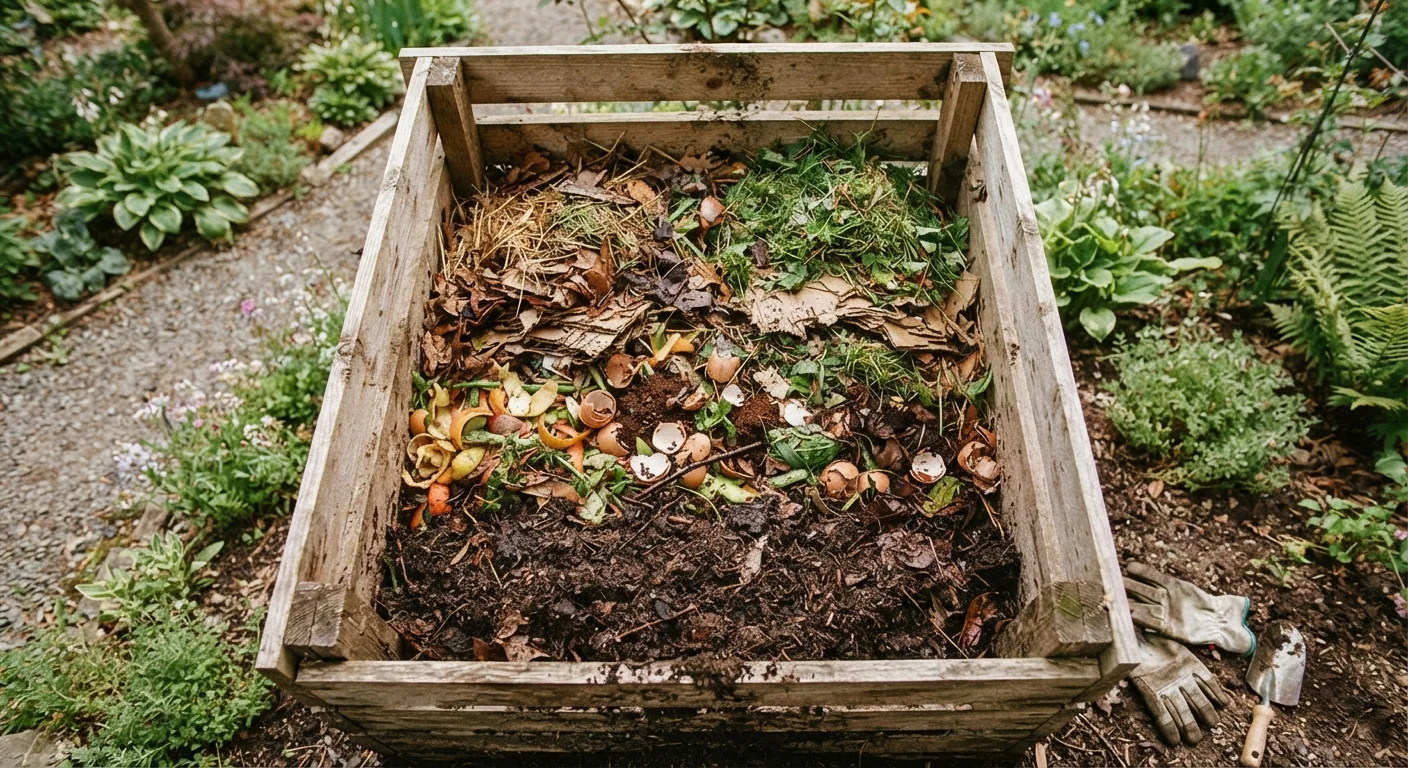
Why Composting Works - and What You're Actually Building
Composting is a managed version of something that happens on every forest floor: organic matter breaks down into a nutrient-dense material that enriches soil. In a home pile, you're creating conditions - the right mix of carbon, nitrogen, moisture, and oxygen - that allow bacteria, fungi, and invertebrates to do this work quickly and efficiently.
The end product, sometimes called humus (the stable, decomposed fraction of organic matter), improves soil structure, feeds soil biology, and slowly releases nutrients to plant roots. It's one of the most practical things a gardener can make at home. If you're building a vegetable garden, it pairs directly with the soil preparation advice in our ground-up approach to vegetable gardening.
What you will need
Understanding the basic chemistry helps you avoid the most common mistakes. Carbon provides energy for microbes; nitrogen provides the protein they need to reproduce. Too much carbon slows things down. Too much nitrogen creates a smelly, slimy pile. The sweet spot sits around a 2:1 ratio of carbon-rich browns to nitrogen-rich greens by volume.
The 2:1 Brown-to-Green Ratio
A reliable starting point is two parts brown material to one part green material by volume. This rough ratio keeps the microbial community well-fed without creating the soggy, odorous conditions that put many first-time composters off. Adjust based on how your pile looks and smells - a pile that stinks usually needs more browns and a good turning.
Setting Up and Stocking Your Pile
With your materials and method in place, follow the steps below to build and maintain a functioning compost pile.
Compost bin or tumbler
Contains the pile, retains heat to speed decomposition, and keeps pests out.
Pitchfork or compost aerator
Used to turn and aerate the pile, introducing oxygen that microbes need to break down material.
Kitchen scrap container with lid
Collects food scraps at the counter so you can transfer them to the pile in batches.
Garden hose or watering can
Maintains pile moisture, which should stay at roughly the dampness of a wrung-out sponge.
Choose and set up your composting method
Pick a spot that gets partial sun and is accessible year-round. You can use a purchased bin or tumbler, build a simple three-sided wooden frame, or start an open pile. Aim for a footprint of at least 3×3 feet - smaller piles struggle to generate the internal heat needed for efficient decomposition.
Collect your 'green' (nitrogen-rich) materials
Greens supply nitrogen, which feeds the microorganisms that do the actual decomposing. Good green materials include fruit and vegetable scraps, coffee grounds and paper filters, tea bags (remove staples), fresh grass clippings, and plant trimmings that haven't gone to seed. Aim for greens to make up roughly one-third of your pile by volume.
Layer in your 'brown' (carbon-rich) materials
Browns supply carbon and provide the physical structure that allows air to circulate. Good brown materials include dry fallen leaves, cardboard torn into small pieces (remove tape and glossy coatings), paper bags, newspaper, straw, and untreated wood chips or sawdust. Browns should make up roughly two-thirds of your pile - a common mistake is adding too many greens and too few browns, which causes a slimy, smelly pile.
Keep problem materials out
Certain materials create real problems in a home compost pile. Avoid adding:
- Meat, fish, and bones - attract rodents and produce foul odors
- Dairy products and eggs - same pest and odor issues
- Oily or greasy foods - coat organic matter and slow decomposition
- Pet waste - can contain pathogens harmful to humans
- Diseased plant material - disease organisms may survive and spread
- Invasive weeds or plants with mature seeds - can germinate and spread when you use the compost
- Treated or painted wood - may introduce chemical contaminants into your soil
Maintain moisture and aeration
Your pile should feel about as damp as a wrung-out sponge. If it feels dry, add water or more greens. If it feels soggy or smells bad, add more browns and turn the pile to introduce air. Turn the entire pile with a pitchfork every one to two weeks - this mixes materials, redistributes heat, and prevents anaerobic (oxygen-free) conditions that cause odors.
Harvest and use finished compost
Compost is ready when it looks dark brown and crumbly, smells earthy (like forest soil), and you can no longer identify the original materials. This typically takes two to six months depending on pile size, materials, and how often you turn it. Sift out any large unfinished pieces and return them to the active pile. Use finished compost to amend garden beds, mix into potting soil, or spread as a top dressing around plants.
Once you have a reliable composting routine, finished compost can also serve a role similar to mulch - protecting soil and feeding it over time. Our article on what mulch actually does beneath the surface covers how these two soil amendments complement each other in a garden bed.
Avoid These Common Pest Attractors
Meat, cooked food, and dairy are the most frequent reasons home compost piles attract rats, raccoons, and flies. Even small amounts can create a persistent problem that's difficult to reverse. If you generate a lot of cooked-food scraps, a sealed tumbler with a lockable lid is a more secure option than an open bin.
Pet Waste Belongs in the Trash
Dog and cat feces can harbor harmful pathogens - including Toxocara and Toxoplasma - that survive standard home composting temperatures. Never add pet waste to a pile used to grow edible plants. Dedicated pet-waste composters that reach higher temperatures exist, but they require careful management and should never be used on food gardens.
Composting is also a natural fit within a broader seasonal home care routine. If you're planning tasks by time of year, the seasonal home maintenance guide can help you schedule pile-building around leaf fall in autumn and bed preparation in spring.
The content on this site is for informational purposes only and is not a substitute for professional advice. Always consult a qualified professional for guidance specific to your situation.